The Emperor on Golden Throne - Part 02: detailing the diorama
Now that all the main structure was built and ready, it was time to add all the extra details to the diorama. Many skulls, seals, pipes and cables were going to be needed to flesh out the entire piece.
Adding the details:
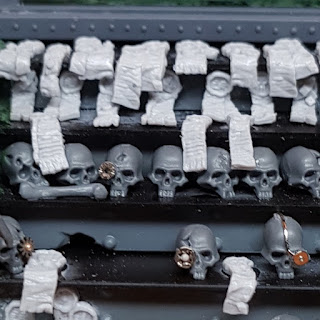
I had already made some servo/cyber skulls from scratch once before on my previous GrimDarkCards piece. I go into it more in depth on that article, but it's simply a case of jazzing up some plastic citadel skulls with watch parts.
Then I just had to place the skulls I created to call back to the placement of the ones in the original inspirational art.
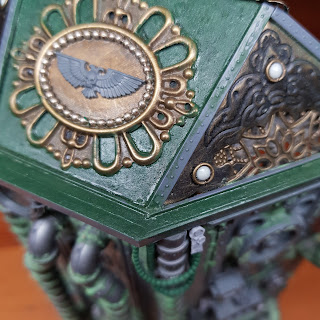
The seals I picked up from here from Anvil Industry, the reason being three-fold, they look awesome, I needed a lot of them and being resin they could be heted up and bent into shape to lay over the stairs and skulls.
The seals I picked up from here from Anvil Industry, the reason being three-fold, they look awesome, I needed a lot of them and being resin they could be heted up and bent into shape to lay over the stairs and skulls.
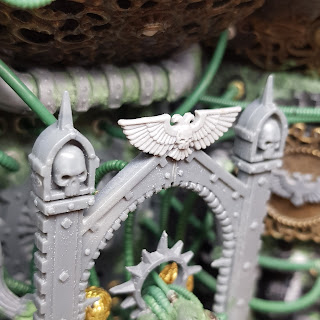
I started to fill gaps as I worked around the diorama. Liquid greenstuff or green modelling paste are good for minimal gap filling and adding some texture to the bare flat plastic pieces.
Everything seemed to be coming together well at this point. I was happy with the main build, the details were echoing back to the artwork the way I intended. All good, ready to move on and add the rest of the details...
And then Jimmy, a friend of mine got in touch with me over Facebook messenger to text chat/catch-up that added a complication. This is paraphrased of course, but the spirit of the conversation went something like this:
And then Jimmy, a friend of mine got in touch with me over Facebook messenger to text chat/catch-up that added a complication. This is paraphrased of course, but the spirit of the conversation went something like this:
Jimmy: Hi mate, how're you doing?
Me: Aye I'm alright bud, how're you?
Jimmy: Yeah, good... Been doing any hobby lately?
Me: I'm in the middle of making a diorama right now, just taking a break.
Jimmy: Cool what're you making?
Me: *sends above image*
Jimmy: OMFG!!! Man that is awesome!!! I can't believe you're making the Emperor!... Are you gonna put lights in it?
Jimmy: OMFG!!! Man that is awesome!!! I can't believe you're making the Emperor!... Are you gonna put lights in it?
Me: Errr... I wasn't intending on adding lights...
Jimmy: It'd look awesome with lights!
Me: I wouldn't even know where to start..!?!
Me: I wouldn't even know where to start..!?!
Jimmy: I'm pretty sure you could figure it out mate.
Me: *sigh*... Fine... gimme a few minutes...
Adding the lights:
So here we are adding lights that were never intended or really factored into the build. Luckily the throne actually had a cavity under/behind it that I thought would be ideal for this.
I've never worked with electricals/lights before and I didn't really have the right supplies. But as they say necessity is the mother of invention, and if there's anything I'm good at, it's improvising and winging things.
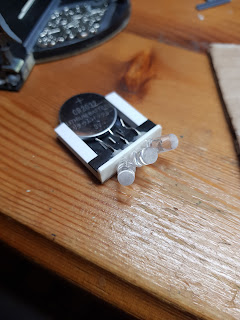
I happened to have some cheap flickering LED tealights on hand that I'd had put aside for making smoke/blast markers. I stripped three of them down to the bare components, took seconds to realise that they just work by completing the circuit of the two wires to the positive/negative of the battery (well duh... yeah gimme a break I'm new to this)
so with some styrene card and I-beam rod I was able to rig up a simple device that allowed me to slide the battery in to work the lights.
I used a small modelling file to roughen up the ends of the LED bulbs so that the light was a bit more diffuse.
Slide the battery into place and ta-da!
I built a simple socket/saddle for my little lighting rig to sit in when in use. It's just several pieces of square styrene rod glued into place. Didn't have to be fancy, it was out of sight anyway.
And then testing it with the lights on and throne in place so I could grab a quick photo of it.
Me: *sends above image*
Jimmy: Oh man that is gonna look amazing!!! I knew you could do it!
Me: Yeah, f*** you...
And that is the story of how my Emperor on Golden Throne diorama got its lights... Because my friend is an a**hole and I love him.
Pipes and cables:
Now was the time to start adding pipes and cables... a lot of pipes and cables...
When I'm making pipes/cables with putty I tend to do a mixed batch of different textures using various cable-maker tools. I made sure to have duplicates of certain textures so they would mirror symmetrically on either side of the build.
When making cables I roll them, then press one end to my overhead light. It keeps them out of the way while they cure and means they stay straight and you don't squash any of the detail lying them down somewhere.
I also had a stash of wires, pipes and styrene rod/tube that would come in handy for this part if needed. The pipes are from an old platformer chemical plant kit I had lying around for years that I picked up at my local model shop. It doesn't seem that readily available anymore but THIS is the one I'm on about.
You can also see some cables/pipes from miniature kits I started adding snaking out from the walls. On the back wall you should be able to make out the small metal rings or "findings" that I used as the sockets for all the greenstuff cables to attach to.
The little golden balls you see either side of the throne and over each shoulder of the Emperor were some more jewellery making beads that I was using to represent incense burners/vents. The ones behind the emperor attached to the throne back and the two side ones were attached to a part from the overhead lamps from the now oh so useful Cities of Death kits.
I decided that I wasn't just going to leave the rear of the diorama plain and wanted to go for a more technical/industrial look. the machine behind the facade as it were. More pipes and some little decorative elements.
A load of greenstuff cables to wire the Emperor into the Golden Throne and his bionic eye/head augmentation was made in a similar way to the servo skulls using various watch parts etc.
And here we are with the Throne in place and all the cabling added around the diorama. I tried to place them in such a way that they looked like a whole mess of wires/cables, but drew the eye to the centre of the diorama to the focal point of the Emperor himself.
Water filter balls are a staple of my hobby tools. Great for eye lenses on some of the skulls, the emperor and as rivets on some of the flat areas for just a touch more detail.
Pre-texturing:
One of my favourite things to do, specially for something that is going to be very grimdark. Is to think about where I'm going to be weathering/rusting a piece before even applying paint and pre-texturing the area.
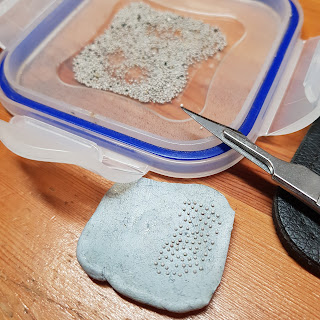
For this you can do a lot of various things, pva glue/sand mix, or superglue and bicarbonate of soda. Or if you want it even finer like I did here, I laid down some slightly watered liquid greenstuff and sprinkled bicarbonate of soda over it.
You just have to let it dry off and then with a soft brush, brush away any loose powder that hasn't sealed to the model.
With a combination of these you can get some interesting textures before priming.
You can just make out the Emperor's robes here. they were given several coats of liquid greenstuff to build up a rough texture to simulate old cloth and I wanted to play with contrasting textures between the Emperor and the Throne he sat upon.
Even though the rear isn't a main focus I couldn't stop myself from a little storytelling. there are a couple of generators as you'll see in the painting step. One in better condition than the other, because it has had to have it's power supply re-routed sometime over the millennia.
Again the green areas you see on the roof here are bicarbonate of soda sprinkled over watered down liquid greenstuff, but then it was finished with a couple of coats of satin varnish. I just wanted a little interesting texture to the metal than the sterile flat plastic provided.
we were at about two weeks of on and off work at this point and most of the building and detailing was complete. I just waited for everything to properly dry and cure before moving on to the painting stage.
Part 01: Building the main structure
Part 02: Detailing the diorama
Part 03: Painting and final details


