Ecclesiarchy Priest - Inq28 Inquisitor art miniature conversion challenge
Around July 2018 there was a challenge hosted on The Inquisitorum facebook page, to create a miniature conversion based on a piece of artwork you had chosen from the Inquisitor Rulebook and this is the piece I ended up creating for that challenge.
I took step pictures throughout the process so I could document it at a later date.
The Build:
After perusing all the artwork in the book for a day or so, I settled on the John Blanche piece that was used as the background image on the Ecclesiarchy character class page. As is usually the case with Mr Blanche's work, the morbidity and excess of little details really spoke to me and I thought it would be an interesting character to try and realise in miniature. As with any of these challenge builds, I decided it wouldn't be an exact copy for convenience sake, but as close to the inspiration as possible.
And with the choice made I hit my bits boxes looking for choice parts to use.
The core of the figure was the now widely used (at least in the Blanchitsu community) Nurgle Lord of Plagues.
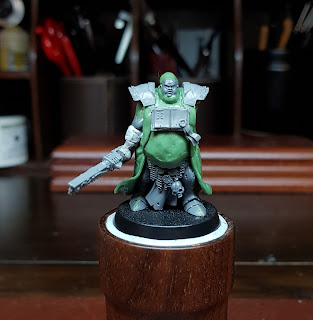
With a suitable head swap and some underlying sculpting to remove the more telling Nurgle details and to add some more body fat where needed, I had the basic structure of the figure in place.
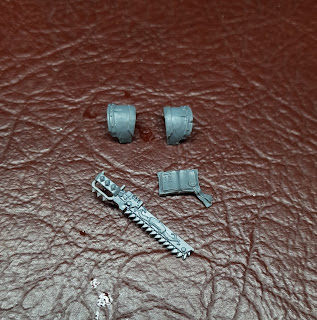
Then it was on to selecting and modifying parts for some of the more recognisable shapes in the details/wargear of the figure. using shaved and cut down Chaos Knight pauldrons, a suitable book and creating the hand-guard for his chainsword.
The pistol gave me some trouble to begin with, i couldn't decide what I wanted. It took me while to realise i could just look at the full size Blanche piece where I discovered it was some sort of custom stub-pistol. I decided I would go with the stub=pistol, but not an exact match, just something inspired by it.
The first layer of of building up the clothing came next. And while the putty was still curing I pressed some of the detail pices in where I planed to glue them later, so i knew they fit and had a sort of "socket" to place them.
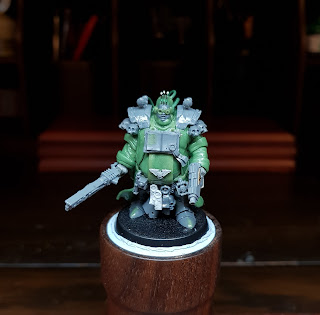
The final stage of sculpting the clothes and detailing the figure came next. I think this is where it started really coming to life for me and I felt i was on the right track. Skulls, seals, cables, power pack on the back, arms glued in place and other detailing added.
The needles in the forehead were a bit of a head-scratcher for a short while, I ended up using bristles from a dustpan brush because they were plastic they would be fine enough and robust enough for such a delicate looking detail. There was no way I was going to try sculpting skulls that small though, I settled for some small blobs of plastic putty which would be painted up to represent pearls or something later.
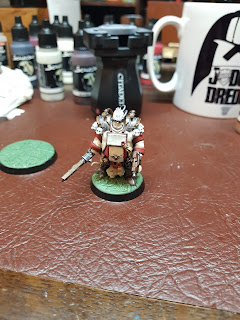
And bar the base, that was the build complete. I wasn't sure what base size to go for at first and the only picture I seem to have of the bases was when the figure was undercoated. I just kept the base simple and went for a flat base detailed with a Greenstuff World roller.
The Painting:
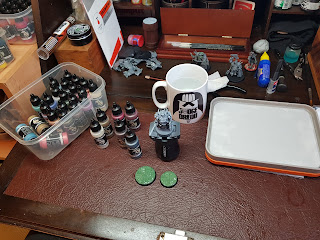
Now was the time to attach the base, in the end I went for the larger one of the two.
After shading the figure I didn't like the colour so much and repainted the robes a brighter off-white so I had more option to pull it down with the shading.
The base was painted grey and given several different coloured washes to give it a little variety.
When finally shaded again I was much happier with the result. Then all areas were given some quick highlighting.
The Finished Figure:
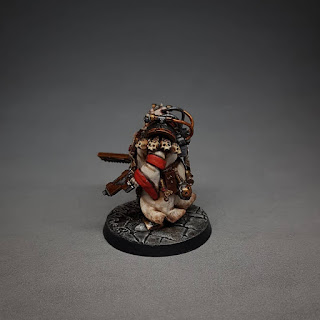
I did some touch ups around the figure, little shading here, little highlight there, stippling dirt around the lower edges of the robes.
And the figure felt complete at this point so I downed brushes and let it be.
This was a really interesting challenge to take part in. If I were to do it again there are a few bits I would probably do a little differently with the build and painting, but that's like every project really. Overall I'm quite happy with how it turned out.
I hope you found this article of interest.
Take care.
I took step pictures throughout the process so I could document it at a later date.
The Build:
After perusing all the artwork in the book for a day or so, I settled on the John Blanche piece that was used as the background image on the Ecclesiarchy character class page. As is usually the case with Mr Blanche's work, the morbidity and excess of little details really spoke to me and I thought it would be an interesting character to try and realise in miniature. As with any of these challenge builds, I decided it wouldn't be an exact copy for convenience sake, but as close to the inspiration as possible.
And with the choice made I hit my bits boxes looking for choice parts to use.
The core of the figure was the now widely used (at least in the Blanchitsu community) Nurgle Lord of Plagues.
With a suitable head swap and some underlying sculpting to remove the more telling Nurgle details and to add some more body fat where needed, I had the basic structure of the figure in place.
Then it was on to selecting and modifying parts for some of the more recognisable shapes in the details/wargear of the figure. using shaved and cut down Chaos Knight pauldrons, a suitable book and creating the hand-guard for his chainsword.
The pistol gave me some trouble to begin with, i couldn't decide what I wanted. It took me while to realise i could just look at the full size Blanche piece where I discovered it was some sort of custom stub-pistol. I decided I would go with the stub=pistol, but not an exact match, just something inspired by it.
The first layer of of building up the clothing came next. And while the putty was still curing I pressed some of the detail pices in where I planed to glue them later, so i knew they fit and had a sort of "socket" to place them.
The final stage of sculpting the clothes and detailing the figure came next. I think this is where it started really coming to life for me and I felt i was on the right track. Skulls, seals, cables, power pack on the back, arms glued in place and other detailing added.
The needles in the forehead were a bit of a head-scratcher for a short while, I ended up using bristles from a dustpan brush because they were plastic they would be fine enough and robust enough for such a delicate looking detail. There was no way I was going to try sculpting skulls that small though, I settled for some small blobs of plastic putty which would be painted up to represent pearls or something later.
And bar the base, that was the build complete. I wasn't sure what base size to go for at first and the only picture I seem to have of the bases was when the figure was undercoated. I just kept the base simple and went for a flat base detailed with a Greenstuff World roller.
The Painting:
My first port of call when coming to paint the miniature, was to look at the colour version of the original artwork for inspiration. As we come to expect, the classic reds, sepias, blacks and white. But this gave me an idea of colour placement on my own figure.
 |
| (image painted by John Blanche owned by Games Workshop) |
I'd been bought a set of Scale75 paints the previous Christmas and hadn't really taken them for a spin, so I tried to use them as much as possible to try them out on this figure.
I decided with the conversion being so complex I'd keep the painting simple. Flat bright base colours, mostly finished off with shading and weathering.Now was the time to attach the base, in the end I went for the larger one of the two.
After shading the figure I didn't like the colour so much and repainted the robes a brighter off-white so I had more option to pull it down with the shading.
The base was painted grey and given several different coloured washes to give it a little variety.
When finally shaded again I was much happier with the result. Then all areas were given some quick highlighting.
The Finished Figure:
I did some touch ups around the figure, little shading here, little highlight there, stippling dirt around the lower edges of the robes.
And the figure felt complete at this point so I downed brushes and let it be.
This was a really interesting challenge to take part in. If I were to do it again there are a few bits I would probably do a little differently with the build and painting, but that's like every project really. Overall I'm quite happy with how it turned out.
I hope you found this article of interest.
Take care.


