Making Sci-Fi Terrain from Water Pistols - The GrimSquirtChallenge 01
I'm taking part in a challenge on Instagram at the moment called the #GrimSquirtChallenge, the purpose of which I have no doubt the title of this post has already given away...
Make sci-fi terrain out of water pistols, because it's summer and they're everywhere and relatively cheap.
I can get on board with that ;)
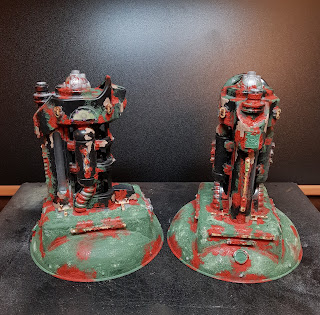
This is part 1, The complete build up until primed and here is what they look like thus far after being primed black with a light dusting of grey to bring out the details:
I think they're already looking alright, but let's see how we got here.
The Builds:
These are the cheapo water pistols I bought from a local bargain shop, made me giggle because they are literally knock-off Super Soakers, on the top handle they have embossed "Super So Aker"
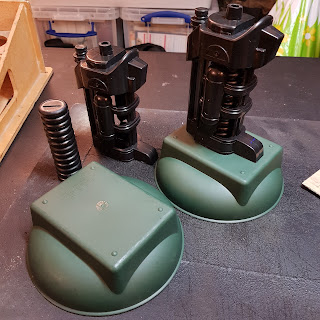
They were completely stripped down and unscrewed so I could see all the parts I had to play with.
With my rotary tool I made my biggest cuts to get the shapes I want, then screwed those sections back together.
Pay no attention to the big white one, I decided not to work on that one for now and it takes no further part.
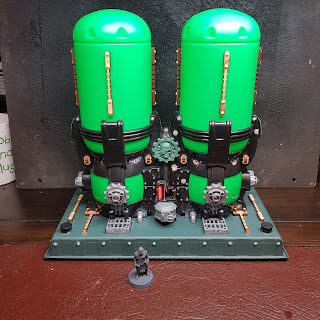
I glued the two tank sections together using lolly sticks as bracing and hot glue. I was going to use the frame with textured styrene as a base, but found some plant pot trays that worked out better.
The unsightly gap between the sections was covered with a length of cable-tie that I heated and bent into shape so it wouldn't try to pull away when gluing.
The two smaller pieces made from the gun barrels had an interesting cavity. I glued together a bunch of lipped bases with the idea of them being like big plasma/thermal coils.
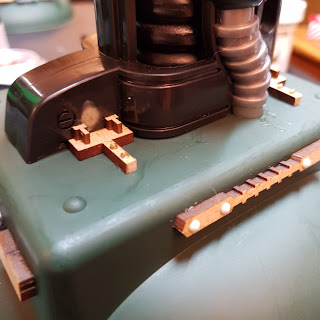
I used bits and pices from varius model kits and the leftover frame parts from mdf kits to start detailing the pieces along with random junk and cables from my terrain stash. You can see the scale of these compared to the figure I placed in front.
Screw holes were filled with Apoxie Sculpt and smoothed over.
I tried to use similar detailing parts across the pieces to kind of reinforce a sort of design philosophy and like they fit together.
Small gemstones and flat beads were used as large rivets all over the pieces.
I decided I wanted more detail to add and something that would make them more fitting for 40k, being my sci-fi setting of choice. So I made some press moulds of details from actual terrain kits using thermoplastic and greenstuff for the casts.
Once fully detailed I wanted to add a lot of pre-texturing before priming, I'm intending to paint these up in a "well used" state. I used superglue and bicarbonate of soda, Vallejo Iron Oxid and one of the GW crackle paints for the various textures all over the terrain.
I also decided I didn't quite like the silhouette of the building with the tanks as much, so I added some support cables to add a little more detail.
And that was the complete build of the pieces, as stated up near the start of the post they were simply primed black with a light dusting of grey right after this.
I have until the end of this month to get the pieces painted up. So all being well I should be back with part 2: Painting.
Until then, take care


