Darren Latham - Lord of Blights Masterclass - Part 05: Painting the Wood

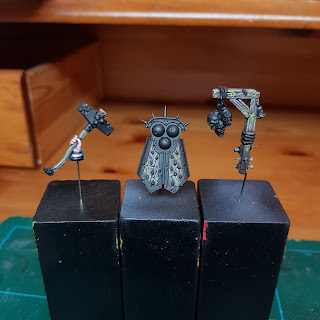
Part 5 of the series and we are on to painting all the wooden sections around the figure.

lord of blights nurgle maggotkin darren latham masterclass miniature painting warhammer

Painting wood. Not a problem. Should be pretty simple right?

(This is a thumbnail of the original video, unfortunately no longer available as of 18/05/2020)

lord of blights nurgle maggotkin darren latham masterclass miniature painting warhammer

There I was. Desk all cleaned up, only the tools I needed to start on this section. Nice big pot of tea at the ready and...

lord of blights nurgle maggotkin darren latham masterclass miniature painting warhammer

"Hang on a bloody minute... There's no wood-grain on this miniature! It's all flat bare plastic with a couple of notches and holes in!?!"

You see... I hadn't watched this video ahead of time because I finished the previous part so quickly. And I thought this was probably going to be a bit of dry-brushing, washing and edge highlighting, done.

Oh no... we're painting in all the bloody wood-grain by hand! I hadn't tried this in years... But we're here now and that's the way it's done...

Out came the reading glasses...

lord of blights nurgle maggotkin darren latham masterclass miniature painting warhammer

This was the easiest part. Solid brown basecoat followed by a black wash to bring back the detail and tint the colour.

lord of blights nurgle maggotkin darren latham masterclass miniature painting warhammer

I'm not going to go blow-by-blow here. But these lines of wood-grain were built up with about 3-4 really thin layers of paint. Yep each one, each line has that many colours built up.

lord of blights nurgle maggotkin darren latham masterclass miniature painting warhammer

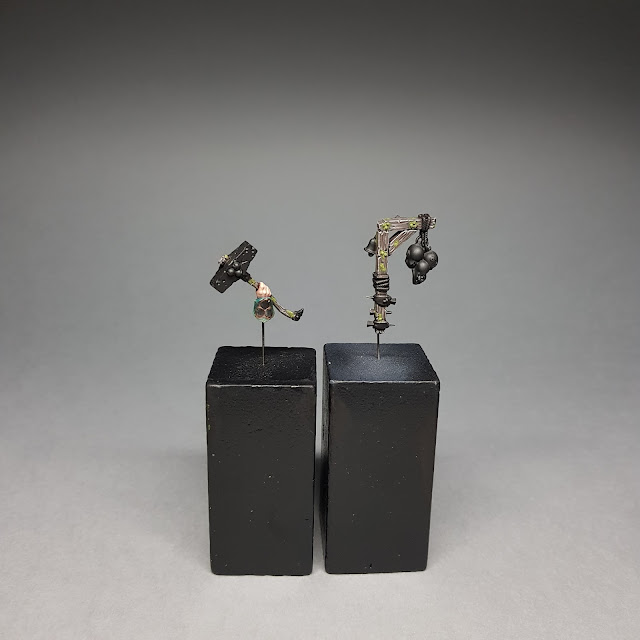
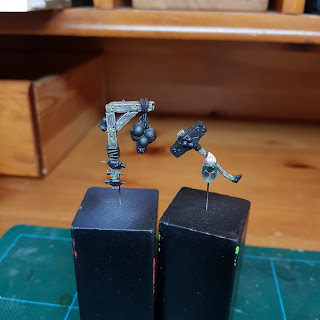
The final section of this video wash making some thin wash/glazes of greens to build up some moss/lichen in places around the wood and that was simple enough.
lord of blights nurgle maggotkin darren latham masterclass miniature painting warhammer
Add caption

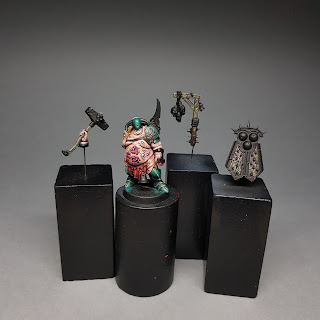
So there we have it, part 5 done. The following images show how the figure is looking so far.

lord of blights nurgle maggotkin darren latham masterclass miniature painting warhammer

lord of blights nurgle maggotkin darren latham masterclass miniature painting warhammer

lord of blights nurgle maggotkin darren latham masterclass miniature painting warhammer

I'm not gonna lie, by the end of concentrating hard and carefully painting all that wood-grain. My eyes felt like they were bloody pickled...

So at the time of writing this is me up to date. Part 6 has just been uploaded and I need to make a start on that.

When I complete the next part I will follow right up with my progress.

Until then, take care.
Comments

  1. That's stunning! I can't believe you did all that by hand :O
    Outstanding work, seriously.

    ReplyDelete
    Replies
    1. Thank you very much mate :)
      I think it was really worth the effort. And as a technique I think I'll keep that one in the back pocket for future projects,
      might come in handy.

      Delete
  2. Wow.

    For adding wood grain, I usually just break out the old razor saw and drag it along the surface, but this is miles and miles better than that!

    I was just wondering what sort of techniques you are picking up for use later... do you see this as changing how you paint, or is it so specific to this model that it does not translate?

    ReplyDelete
    Replies
    1. I normally do the razor saw trick for wood-grain too, bit of dry-brushing and a washing, good to go :D

      As for this changing the way I paint... erm... Yes and no I suppose. These are techniques I've used in the past, as most of us have when learning to paint following the old citadel guides for instance. Glazing, stippling, painting wood-grain!

      I just think that somewhere down the line, I don't know how to say it exactly... I kind of forgot to use them maybe? And they fell out of use as techniques I would go to when painting. So it's been nice to revisit them and I think I might try to use them in the future and not let them slip away again.

      I think what I have really learned so far following this series is to really think about the miniature in front of me. Normally I'd build the figure, have half an idea of what I'd want it to look like and just start. yes there'd be some experimenting and it may not turn out exactly as planned, but it is always a little off the cuff or spontaneous.

      I think what I'm really going to take away from this is the things that Mr Latham spoke about during the planning step and reiterated when painting the different parts:
      Material (X) is different to material (Y) and so is material (Z), the painting of each of those ares should show they are made of different materials and the surfaces/finishes should show that.

      Maybe not so crazy on the paint layers and time sink (specially when painting units/armies), but I think it's something I should keep more in mind. I had been kind of doing this more in the later stages of painting, deciding what would be matte or gloss or weathered/rusty for instance. But take the time to think about it from the start with the colour choices too.

      Delete

Post a Comment

Comments and critiques are always welcome.

Instagram Slideshow

Popular Posts