Darren Latham - Lord of Blights Masterclass - Part 07: Painting the Gallows
Part 07 of the series takes us through completing the main details of the gallows/trophy pole on the back of the Lord of Blights.
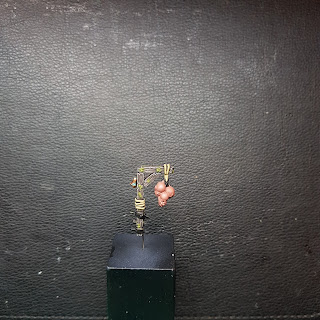
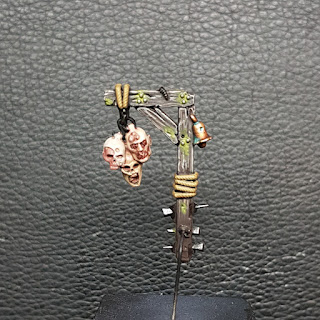
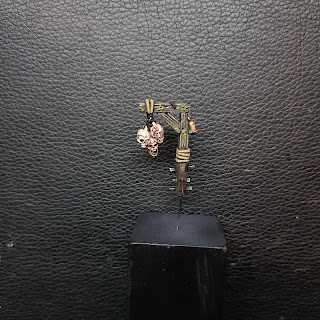
The details that are covered in this part are the hanging severed heads, the ropes and the metal spikes and rivets. Compared to much of the previous parts this is a relatively short one.
Basecoats:
The three heads were all painted the same deep flesh colour to begin with so they share a common colour shade, but they begin to vary quite quickly as you'll see in the next steps. The ropes were also given their first base colour at this point.
I on the other hand had to do another round of painting the heads because I wasn't satisfied with them. I had all the previous colours used on my wet palette still so I went back over everything with very thin glazes and spot highlights to really bring it all together and try to get rid of any remaining rough/gritty spots I could still see.
The astute among you will see there are still some unpainted details, that would be a couple of maggots and the skin pierced by the spikes. These parts will be painted in the coming parts of the masterclass along with other similar parts and when the figure is constructed.
I believe I've discovered through doing this masterclass that I really dislike working with a lot more GW/Citadel paints than I realised, more so when trying to thin them down. I think it's much worse on the lighter colours in the range that seem to get that rough, chalky effect.
So Part 07 down, only 3 parts left to do. Part 08 is some more of the smaller details across the figure, Part 09 is constructing the figure and cleaning up any highlighting and shading across the now singular piece. And part 10 is creating the base...
I'm getting excited to see the figure finally complete, I will be back as shortly as I am able with Part 08.
So until then,
Take care
The details that are covered in this part are the hanging severed heads, the ropes and the metal spikes and rivets. Compared to much of the previous parts this is a relatively short one.
 | |
|
Basecoats:
The three heads were all painted the same deep flesh colour to begin with so they share a common colour shade, but they begin to vary quite quickly as you'll see in the next steps. The ropes were also given their first base colour at this point.
First Highlights and Shading:
The three heads were to be painted in distinct skin tones/hues to add a little variety, the each began with an over-brush of the same lighter skin-tone, but then each had a different colour added for successive highlights.
The head on the left was taken to a very tone with the addition of pale blue and minimal shading, the head in the middle had a pale green added to make it a little more rotten looking and also had green-brown shading, finally the head on the right was highlited with the edition of a bone colour and had warmer red/brown shading to make it look like the freshest of the trophies.
The ropes were given a brown wash at this stage. And I kind of jumped ahead a little and based some of the metallic areas while waiting for the other areas I was working on to dry as it wouldn't affect anything else anyway and I just wanted to keep on working.
Second Shading and Highlights:
Pretty much more of the same, some more highlighting and shading done across the details.
And this is where the problems I was going to face on this part finally made themselves known...
Just like in the skin section back in Part 02: Painting the Skin as I was working with ever thinner paint and finer highlights I ran into them breaking down and getting really rough/grainy again. So as I learned before I had to balance the dilution with a mix of water and thinner medium to keep the structure of the paint workable.
At this point painting and highlighting the bone sections of the heads began and also some dark brown pin-washing between where all the heads touched to separate them somewhat.
The second problem I ran into was reminiscent of what I had to deal with in Part 05:Painting the Wood (funny that it is exactly the same model part).
The first highlight stage of the rope began, I had to neatly and carefully line each of the rope fibres sculpted onto the piece. But I discovered that the sculpted detail is only on the front and back faces of the piece, on the sides, top and bottom (which I forgot to photograph, my apologies) it was just a flat roll so I had to simulate the individual fibres/lines myself.
Not a large or difficult job by any means it was just a bit of a surprise in the moment.
Final Details and Tweaks:
At this point in the actual video Mr Latham had finished the heads and rope and was moving on to just do the metal pieces and finish.
I finished the second and final highlight of the rope sections, much easier with the lines painted in the previous step.
I on the other hand had to do another round of painting the heads because I wasn't satisfied with them. I had all the previous colours used on my wet palette still so I went back over everything with very thin glazes and spot highlights to really bring it all together and try to get rid of any remaining rough/gritty spots I could still see.
But once I was happy with how the blends looked on the skin of the three heads it was a very quick step that followed. A quick basecoat of the remaining metals, washed and then edge highlighted with a lighter silver.
Part 07 Complete:
And we are done! Not perfect by any means, but I am happy with the result and how I overcame the problems I was facing during this part.
I believe I've discovered through doing this masterclass that I really dislike working with a lot more GW/Citadel paints than I realised, more so when trying to thin them down. I think it's much worse on the lighter colours in the range that seem to get that rough, chalky effect.
So Part 07 down, only 3 parts left to do. Part 08 is some more of the smaller details across the figure, Part 09 is constructing the figure and cleaning up any highlighting and shading across the now singular piece. And part 10 is creating the base...
I'm getting excited to see the figure finally complete, I will be back as shortly as I am able with Part 08.
So until then,
Take care


